Thursday, March 18, 2021

Punky Manor - Vintage Stock Car - Tribute Build

Body and Paint - Part 4


Now that the Tribute Torino is up to the point where I can apply the topcoat colors, I'd like to expand on my paint color and paint system decision making. 

First up is the choice for paint colors.

Since I only have a couple pictures of my late Cousin Punky's original Torino race car, I am pretty much guessing what colors they used back then. When Punky built his Torino in early 1974, his Dad Neil Sr. was fixing up and selling early 1970's Ford pick-up trucks at his used car lot. I am sure they had some of those truck colors laying around. It also seems that they didn't paint the Torino with bright white? Wimbledon White was a very popular color for both Ford cars and trucks for decades, so that seemed the most logical choice.

On my first attempt at having colors mixed, I went to a local automotive paint store and we looked up the colors that were actually used on the 1972 - 1973 Ford Torinos. I had them mix up a pint of code 9C White and code 6C Medium Yellow Gold. Ford made 3 different colors of yellow for that year Torino and they looked different on every paint chip chart I looked at.

I bought a small amount of each color so I could do a color test before I spent a lot of money on paint that might not look right. I painted up a test panel and discovered that I didn't like the yellow color at all. It just looked too much like brown mustard and was too grey and dull (see below right). So, I painted another panel using a spray paint color called Marigold. The new color looked a lot closer to the yellow in the photos of Punky's car.


Another thing that I discovered after painting and lettering the first test panel was that the lettering I used for Punky's name was too thin. I am using this lettering on the roof of the race car, so I want it to show up well.

More about colors coming up, but let's talk about paint type. Most modern cars are painted with catalyzed urethane base color with catalyzed clear over the base. No offense to anyone out there, but I'm building a tribute to a car that was built and painted in 1974. Base/clear paints were not used until the 1980's and then they were only sprayed on high-end luxury cars. Punky's original Torino was most likely painted with single-stage Acrylic Enamel. Not sure about anyone else, but I can tell the difference between the two systems by looking at the car. It would be like putting computer cut vinyl lettering on a vintage race car instead of hand painted lettering. It has to look period correct.

Now I had to think about how to get the two different colors on the car. I have a high-end SATA professional spray gun, so that part was covered. The weak link was my smaller sized air compressor. The weather was also a factor. It was going into the end of September and early October and I had to have high enough temps to spray the paint. 

I think it would be regular practice to paint the whole car white first, then mask off the white areas and paint the yellow second. I decided to mask off where the yellow was going and only paint the white areas first. I was betting that this would be a better approach so my small air compressor could keep up. 

The end of September (2020) rolled around and I caught a nice warm day, opened up the white paint and it was not even close to what I had asked for. I was looking at a gallon of paint that looked like 1984 computer beige, not Wimbledon White. I had to run back to the paint store and buy another gallon of bright white acrylic enamel. I then used the ugly beige color to tint the bright white. Finally I could get some proper Wimbledon White paint on the car.


Next up it was time to mask off all the Wimbledon White parts of the car and paint the yellow. For the yellow color, I just took the test panel to the paint shop and found the closest match that I could. I wasn't too worried about where the two colors butt up against each other because I was planning on painting a 1/4" black hand painted line over the seam.


After letting the white paint set-up for a couple weeks, I was ready to mask off the white areas and get the yellow paint sprayed on while the weather was still good. I caught a break on October 9, 2020 with higher than normal temps and got the 2nd color shot on the race car. 


After 5 years of chasing parts, replacing most of the body, and pretty much rebuilding everything under the exterior sheet metal, the race car finally has paint on it. I can't even begin to guess how many hours I have invested. I do however have a really close idea on what the cost of the project is. Through the whole project, I have been saving receipts and entering them into the Quicken program, to track what I've spent. Let's just say it held up to my old rule..."figure out what you think it will cost and triple it". 

Next up is getting some custom built stainless steel headers on the engine. I have about 50 more little projects to complete before I can finally do the hand lettering. This, by far will be my most favorite thing to do on the entire project!

Take care for now. 

Sunday, March 14, 2021

Punky Manor - Vintage Stock Car - Tribute Build

Body & Paint - Part 3

The Torino's body was in rough condition pretty much all the way around the car. The drivers side rear quarter looked to be repairable for the most. That was before we tried unloading the car into a shed for short term (nearly two years) storage.

I had rented a car trailer from U-haul to move the race car from Racine, Wisconsin up to Menomonie, Wisconsin. We were trying to roll the car off the trailer with absolutely no brakes and not much for steering. We put some wood blocks behind the race car to stop it but it missed those and slammed into a large wood beam. And that is the reason I had to replace the only good panel on the car.

In the picture below you can see the large wood beam directly behind the rear of the car. The other picture shows the damage done in an area that is not easy to pull out or repair.


Since the passenger side of the Torino needed to be completely replaced, I decided to start on the "easier" side. First off was to replace the part that I flattened out on the big wood beam. 

I was able to find the upper rear part of the right side rear quarter at a Ford yard down in Hastings, MN. 

The patch panel looked pretty rough, but the actual area I needed looked like it was still all metal.


I started the left rear quarter repair by marking and cutting off the damaged area. Then I used an air powered flange tool to create a lip for the patch to fit into. Then the whole thing is tack welded inside and out. Once again, fiberglass reinforced bondo goes down first. Then I finish with multiple thin layers of lightweight body filler and glazing putty. Most all of the raw metal body parts were coated with self-etching primer before a coat of flat white primer went down.


Next up I needed to cut off the old drivers door and front fender, which were welded together.


After the drivers side was opened up I needed to start test fitting the new door and fender and figure out how they were going to fit, and more importantly, how to attached them.


After making some progress on the drivers side, I decided to move on over to the problem side of the car. I must have built up a little confidence starting on the "easy" side, because I went ahead and cut the whole passenger side off.


You can't see it in the above pictures very well but both of the rocker panels were rusted through and in really bad shape. I came across a reproduction pair of rockers and replaced them both.


All four wheel openings need to be cut larger to clear the large dirt track tires and wheels. In order to determine where to make the cuts, the engine had to be installed. The tires were also installed on the car and I set it down on the floor to check ride height.


Now the car is ready for the rest of the panels to be installed and welded in place.


I then shot the whole car with primer/surfacer and checked for imperfections. At this point, small amounts of glazing putty are applied and fine grit sanding is done. 


Once the primer was sanded to 400 grit, I sprayed the whole car with white epoxy primer.


As I look over the above pictures, I can't help but think that there are some images and steps missing.  The brief descriptions on this page do not cover the many hours it took to hand roll all the wheel openings so they were not just sharp edges. It also doesn't show the number of times each panel was test fitted and modified, then reinstalled. Or using a blow torch to try and get the oil can clunks out of the roof and rear quarters. I also had a few small masking paper fires while welding the doors on.

By the very nature of these kinds of projects, it take hundreds of hours and a fistful of money to bring something like this to completion. Up to this point, the work has been dirty, dusty, full of fumes and grinder dust. The cleaner and more enjoyable work is yet to come. The race car is now ready for topcoat colors and then onto final assembly. Take care for now... 

Thursday, March 11, 2021

Punky Manor - Vintage Stock Car - Tribute Build

Body & Paint - Part 2


One of the biggest challenges for getting the Tribute Torino ready for paint was finding nearly 50 year old replacement body parts. A lot of older muscle cars have a wide variety of replacement body panels available. That is not the case for the 1972 Ford Gran Torino Sport. There are no front fenders available, and only poorly made patch panels for the lower half of the rear quarters.

In my last post, I covered some of the 5 years of adventures that were required to track down all the parts I needed to do the repairs to the body. I ended up having to find two passenger side rear quarters, cutting them down and welding them back together to make one full rear quarter.


After Welding the two halves together, I filled the weld area with fiberglass reinforced body filler. After that was leveled out I applied a few coats of lightweight auto body filler and then primed the quarter. I also finished the inside of the rear quarter so that the welded seam could not be seen when the trunk is open.


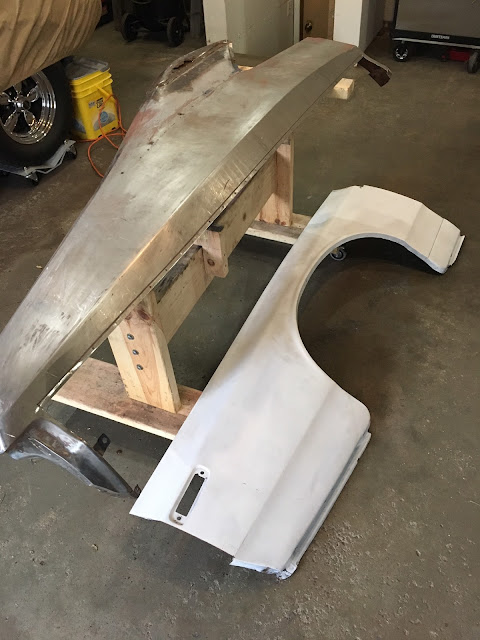
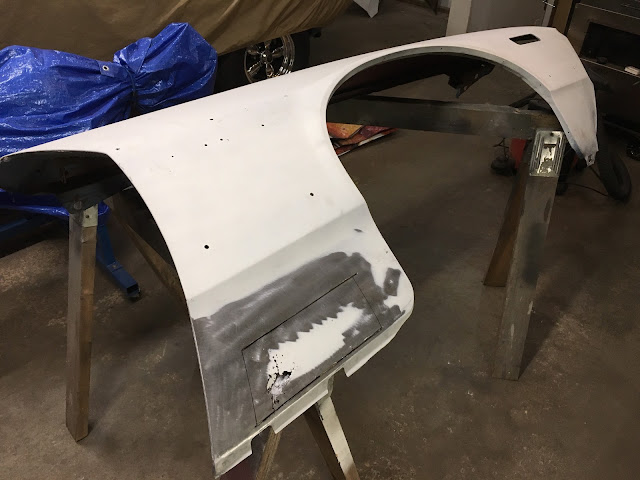
Since the front fenders are not being reproduced, I drove down to Kansas City to pick up a pair from a FaceBook Torino Group member. They were in fairly decent shape but did need some repairs once I cut off all the unwanted sheet metal.


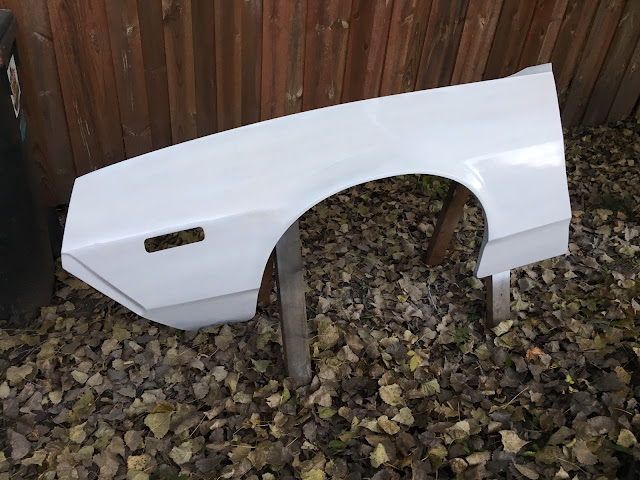
I fabricated patch panels for both fenders. The lower part of the drivers side front fender was the roughest of the two.


So, the right rear quarter panel is ready for assembly as well as both front fenders. In my next post I will continue on with the rest of the body panel prep. I also have a funny story to share about how not to unload a race car. Take care for now.