
Restoration Continues - Summer/Fall 2019
We are now going into Fall and the days are getting shorter and the temps are starting to dip down towards the freezing mark. Most of my Summer and now Fall weekends have been dedicated to getting as much done on the Tribute Torino build as possible before Winter hits.
In my last post I showed some of the work I had completed on the interior of the race car. I'm happy to say that I have made quite a bit more progress on the rest of the interior. I have also started doing some work under the hood and in other areas that needed attention.
I spent a fair amount of time trying to finish some of the work under the dash before I welded in the drivers side floor panels. I had to resolve how the brake and clutch pedal assembly would be mounted and if it lined up with the new master cylinder. The entire clutch mechanism is pretty much up in the air. For now I just had to move forward with other things.
Once the brake pedal was in place, I could fab and install the new steering column.


Once most of the work under the dash was completed, I was able to finish welding in the drivers side floor sections.


With the interior floor mostly done, I was able to move on to some issues that popped up under the hood. When I removed the radiator support, I discovered that the passenger side front frame horn had taken a pretty bad hit. I made a run to Joe's Auto Sales down in Hastings, MN and picked up a replacement frame horn section.
While I was fixing that, I decided to add new radiator support bolt hole plates and then welded in steel covers over the factory crumple zone holes.


After the frame horn repairs were made, I turned my attention to the front frame crossmember area.
To give you an idea of what the crossmember originally looked like, I will add one of the first images I took of this area.

I started out by grinding for an hour or more just to get the horrible welds off the frame. I then decided that I should fill in the area that was cut out. I welded in a couple of tubes side-by-side to fill the gap. I then recreated the front lip that had been removed. Once all that was cleaned up I coated it all with 3M seam sealer.

A few other things that can be checked off the to-do list; the racing seat is mounted, fire extinguisher is installed, seat belt mounts are welded in. Rear floor sheet steel is formed and primed and will go in when all other work is completed in that area.
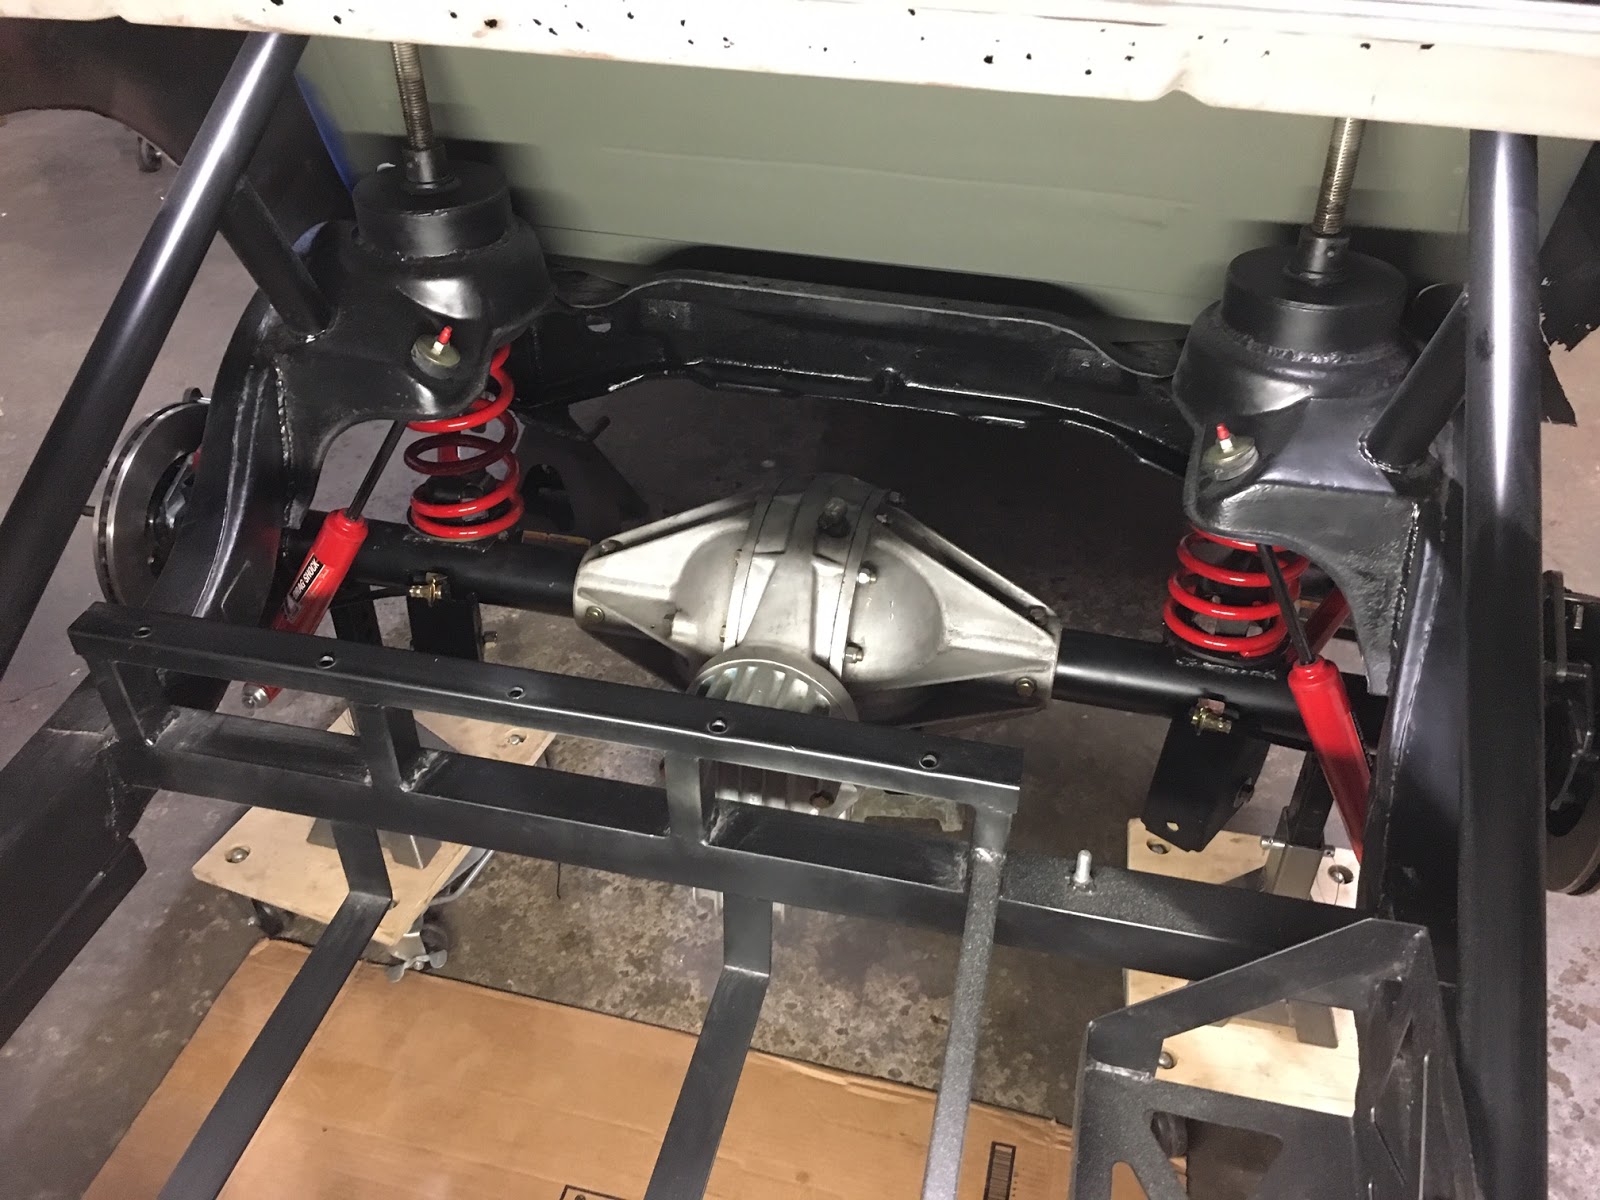
One more major piece of the puzzle; the Frankland quick change rear end (and rear suspension) is finally bolted under the car. I have invested a quite a bit of work and money to get and install a Frankland rear end to match the one Punky used in his Torino.
I was also able to fab and install the rear speaker deck cover panel, weld in windshield support bars, install dash speaker and defrost covers, and rivet in cowl cover aluminum panels.


Next up I will be fabricating an aluminum dash that will hold all the electrical components. I also hope to drop the engine in and see how the Torino looks on the ground. Take care for now...