Saturday, November 9, 2019

Punky Manor - Vintage Stock Car - Tribute Build

Restoration - In slow motion for the cold season! Winter 2019


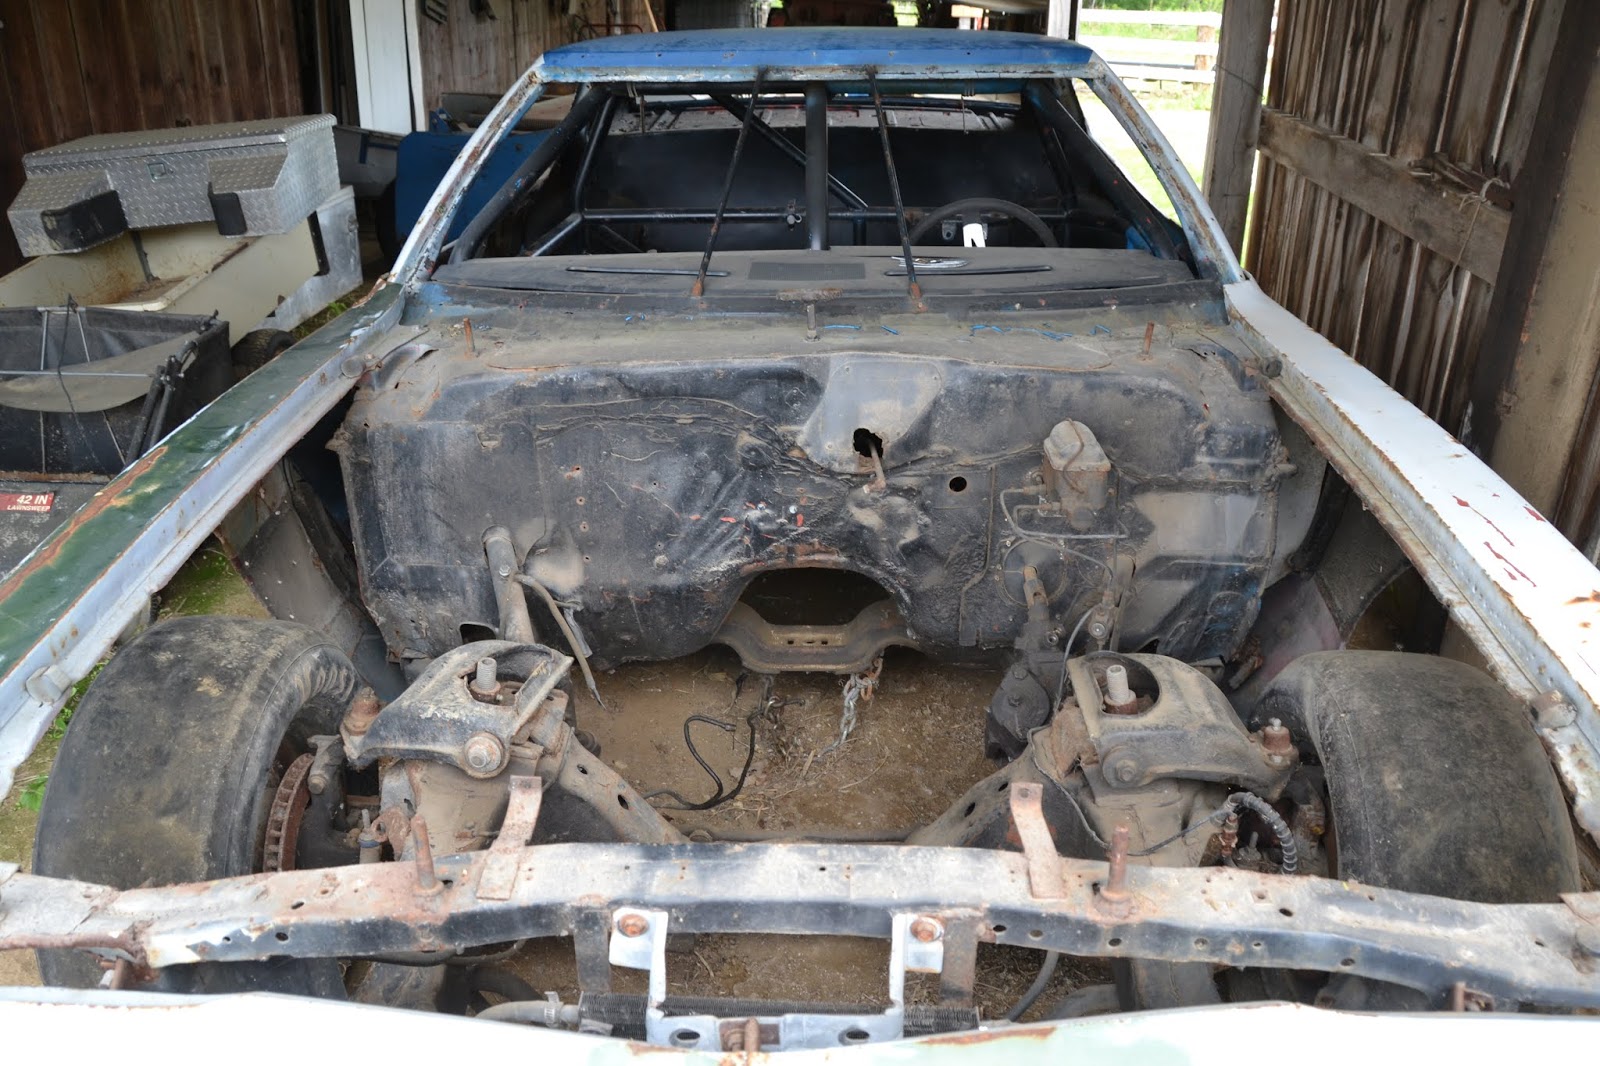
Well, Fall has transitioned into Winter and our first snow fell today (Nov. 6th, 2019). I managed to make good progress over the Summer but it was time to make room in the garage for my wife to park her vehicle. I think I have completed a good chunk of the really messy, and difficult work, I can now focus my attention on replacing most of the exterior panels. All of those panels covered in bondo in the photo below will be heading to the scrap heap.


In the picture above you can see several "new" body panels on top and under the car. The drivers side rear quarter panel is sitting on the roof, the front fenders are tucked under the car, and the door skins are on the hood. The trunk replacement is duct taped in place, and the GTS hood is in place under the door skins.


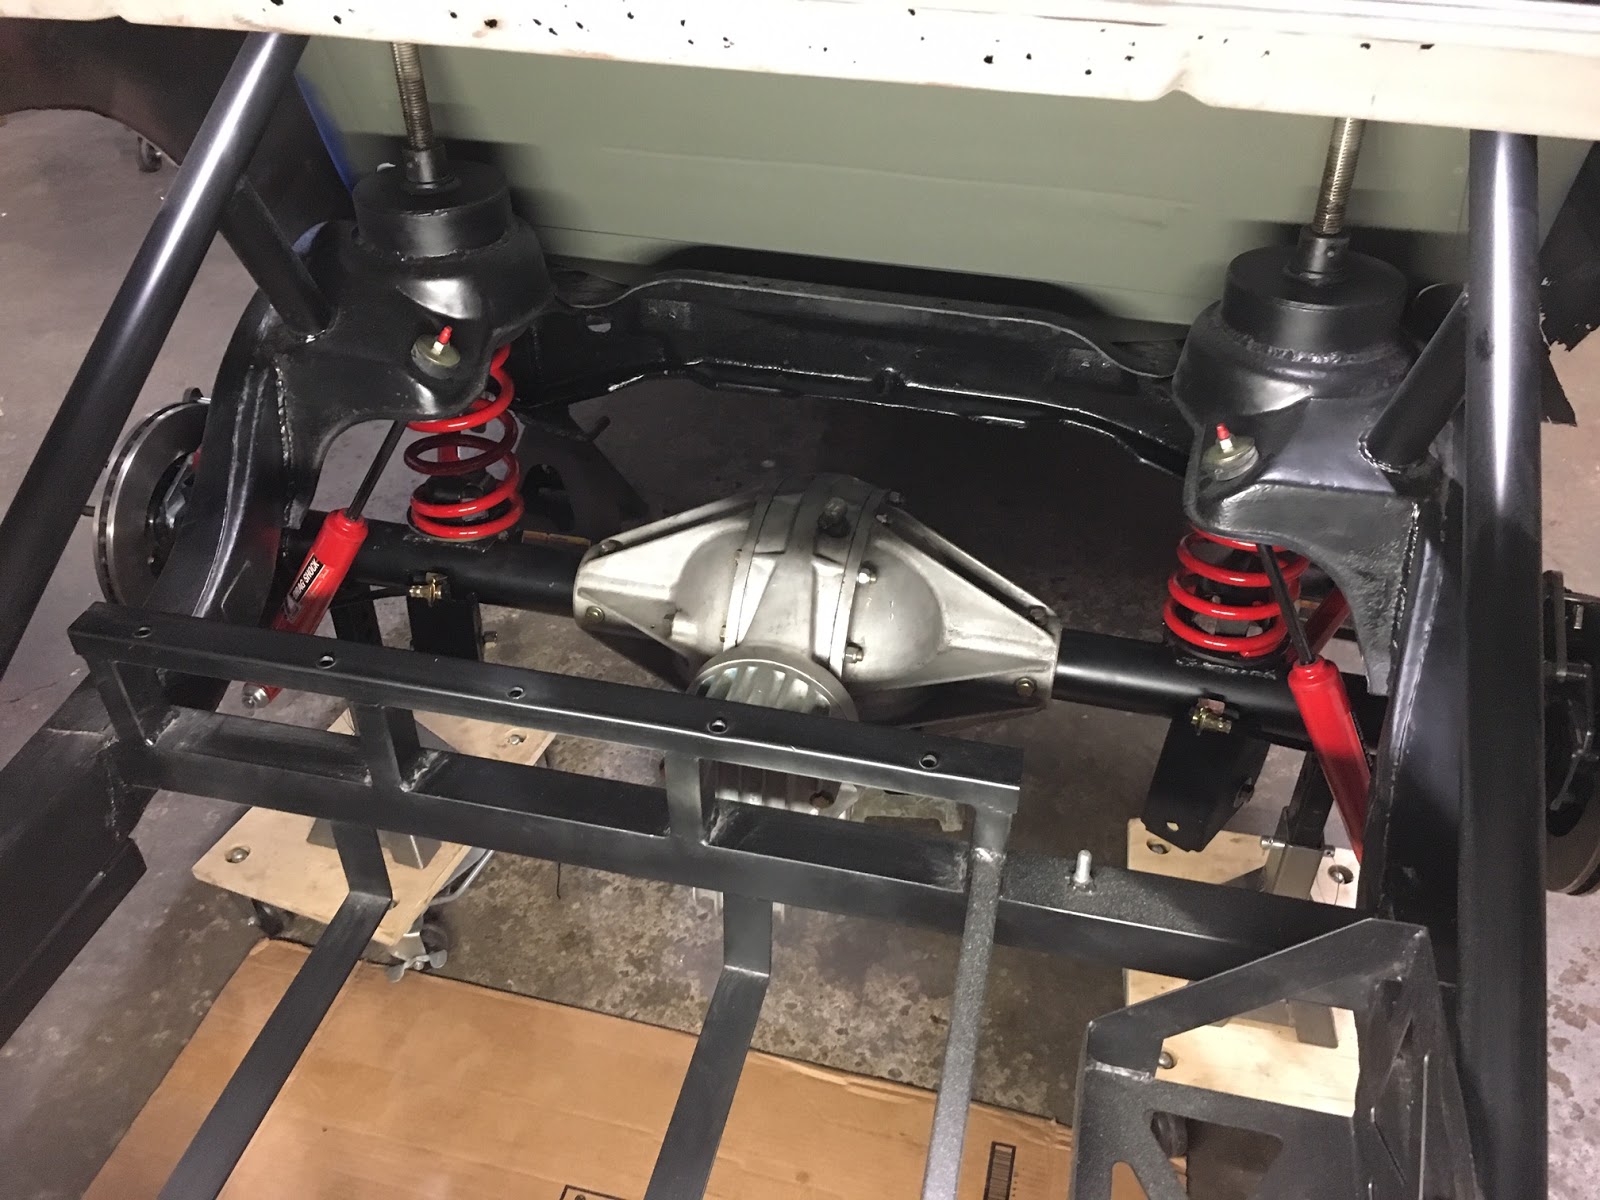
Before I put the Torino in hibernation mode for the Winter, I did a test fit of the engine and transmission assembly. In the process I was able to mark where the shifter hole needs to be cut in the floor. With the full weight on the front end I can now see how much the front fenders need to be opened up. I also need to make some modifications in order to get the engine sitting down a little lower. That Blue Thunder hi-rise aluminum intake moves things up quite a bit!


Even though the Torino is tucked away, that doesn't mean I can't tinker around with a few things over the Winter. I have cut out the aluminum dash panel and fuse block panel. After test fitting, I pulled those two panels out of the car before I covered it up so I can take them inside to work on. Most of the electrical components have been mounted on the fuse block panel already. I have also installed all the gauges in the new dash panels. The live run engine stand that I build earlier this year came in handy for testing all electrical connections. I simply had to mark the wires and then transfer them over to the new panels.


Once again, when spring hits, the body panels go on, then I need to get the driveline figured out. Once everything else is fabricated and test fitted, I will be thinking about paint.

Have a good Winter....be safe out there and take care for now.

Monday, September 30, 2019

Punky Manor - Vintage Stock Car - Tribute Build

Restoration Continues - Summer/Fall 2019


We are now going into Fall and the days are getting shorter and the temps are starting to dip down towards the freezing mark. Most of my Summer and now Fall weekends have been dedicated to getting as much done on the Tribute Torino build as possible before Winter hits.

In my last post I showed some of the work I had completed on the interior of the race car. I'm happy to say that I have made quite a bit more progress on the rest of the interior. I have also started doing some work under the hood and in other areas that needed attention.

I spent a fair amount of time trying to finish some of the work under the dash before I welded in the drivers side floor panels. I had to resolve how the brake and clutch pedal assembly would be mounted and if it lined up with the new master cylinder. The entire clutch mechanism is pretty much up in the air. For now I just had to move forward with other things.

Once the brake pedal was in place, I could fab and install the new steering column.


Once most of the work under the dash was completed, I was able to finish welding in the drivers side floor sections.


With the interior floor mostly done, I was able to move on to some issues that popped up under the hood. When I removed the radiator support, I discovered that the passenger side front frame horn had taken a pretty bad hit. I made a run to Joe's Auto Sales down in Hastings, MN and picked up a replacement frame horn section.

While I was fixing that, I decided to add new radiator support bolt hole plates and then welded in steel covers over the factory crumple zone holes.


After the frame horn repairs were made, I turned my attention to the front frame crossmember area.

To give you an idea of what the crossmember originally looked like, I will add one of the first images I took of this area. 


I started out by grinding for an hour or more just to get the horrible welds off the frame. I then decided that I should fill in the area that was cut out. I welded in a couple of tubes side-by-side to fill the gap. I then recreated the front lip that had been removed. Once all that was cleaned up I coated it all with 3M seam sealer.

   
A few other things that can be checked off the to-do list; the racing seat is mounted, fire extinguisher is installed, seat belt mounts are welded in. Rear floor sheet steel is formed and primed and will go in when all other work is completed in that area.

One more major piece of the puzzle; the Frankland quick change rear end (and rear suspension) is finally bolted under the car. I have invested a quite a bit of work and money to get and install a Frankland rear end to match the one Punky used in his Torino.


I was also able to fab and install the rear speaker deck cover panel, weld in windshield support bars, install dash speaker and defrost covers, and rivet in cowl cover aluminum panels.


Next up I will be fabricating an aluminum dash that will hold all the electrical components. I also hope to drop the engine in and see how the Torino looks on the ground.  Take care for now...


Thursday, August 22, 2019

Punky Manor - Vintage Stock Car - Tribute Build

Restoration - Progress - Part 1


So far on the Torino Tribute build I have acted as Designer, Engineer, Project Manager, Graphic Designer, Industrial Designer, Body Repair Technician, Painter, Parts Hunter, Researcher, Fabricator, Welder, Engine Assembly and Test Guy. I know I have a big head, but that is a lot of hats for anyone to wear!

Since I brought the Torino back home in Mid June I have spent most weekends and several weeknights working on the car. In my last blog I mentioned that I had planned on starting on the rear of the car and will work my way forward. 

Below is a photo of the Torino on one of the nights that I worked past dark. I really haven't done much of anything to the exterior of the car yet. My focus so far has been to get the internals rebuilt and then start replacing body panels. Just over the roof of the car in the center of the photo is a stack of "new" body panels.

For the rest of the post I think I will add some before and after pictures and describe what I have done up to this point.  


My first order of business was cutting off all the old bars and such from the trunk area. The mounts for the fuel cell were a bit too low for me, so I decided to replace the whole mess. The original 1972 Gran Torino has open channel frame rails for the first 18 inches or so. In order to give the car more strength, I boxed in the rear frame rails.


I removed the factory sheet metal rear crossmember and added a rectangular tube between the rear frame rails. I fabricated new body mount brackets and filled in all the holes that were cut by previous owners. I also added a protective cage around the fuel cell.


Next up, I designed and fabricated new fuel cell mounts and a new battery box. I also added long roll bar tubes from the back of the main roll cage hoop down to the rear frame rails. Those bars were also reinforced about midway by a couple more tubes that run down to the coil perch area.


The green color in all of these images is a self-etching metal primer. Once it was coated with that, I added a semi-gloss black topcoat.


Inside the car I discovered that I had a lot of work cut out for myself. Once I started removing the patch panels, it looked like about 80 percent of the floor needed to be replaced. The most discouraging thing was that someone had cut the drivers side main crossmember completely out.

I ordered the only passenger side replacement panel I could find for the 1972 Torino. It didn't seem like it was a very good match to the original but it was better than the shoe-formed piece that I cut out!


The next big challenge was the drivers side floor. All I could see on this side was one patch panel added on top of another, all the way to the firewall.


I ended up cutting most of the floor out and made the decision that I needed to find a factory floor pan. I wanted to keep the floor as original looking as possible to keep the car looking like the ones they raced in the 1974 season.


I then spent about 8 hours cleaning up and fitting the "new" junkyard floor panel.


Well, that gets me up to the next project. Before I weld in the drivers side floor I need to take care of a few other issues. The entire steering mechanism was rusty and old so I need to replace that. 

The race car came with an automatic transmission so it only has a brake pedal. Since most of the Gran Torino's came with automatics, I haven't been able to find a clutch and brake pedal assembly. I did locate and purchase a hand built brake/clutch pedal assembly a while ago, so I need to see if I can make it work. I will also have to fabricate the clutch Z bar and linkage.

Once I get a few of those mechanical issues figured out, I will finish welding in the drivers side floor panels.

For now I better get some rest....take care.

Wednesday, July 24, 2019

Punky Manor - Vintage Stock Car - Tribute Build

Restoration Begins - Summer 2019


When I first stumbled on to the Gran Torino down in Racine back in May of 2015, I knew it needed a lot of work. I convinced myself that building an old dirt track race car would be a lot easier and less expensive than building any other type of street car. After all, you don't have any trim, no glass, pretty much no interior. It's just a frame, roll cage, engine, and four tires and wheels, right? Boy did I learn otherwise.

On my initial walk around of the car, I didn't think it looked too bad. The roll cage looked pretty decent, it had coil spring buckets installed on all four corners, and was already set up for racing. After looking closer and closer, I found more and more things that really needed to be fixed or replaced. I don't want to bash any of the previous owners, but the old Gran Torino Sport had seen a rough life!

Before I get into this too far I should present a little disclaimer. I know very little about the history of this car. I do know that it was raced on some asphalt tracks in Southeast Wisconsin. Before anyone is feeling bad about this classic car being turned into a race car, from what I have discovered so far it would not have made a good candidate for any kind of high end restoration! 

I will explain my above point in more detail in this post.

Here are a couple pictures of the exterior of the car as it was when I took over ownership.


And here are a few pictures of the interior structure...


Dash Area


Rear Seat Area


Engine Bay


Trunk/Rear End Area


In the process of prepping several smaller parts, I was able to locate a sand blasting shop not far from our home. I made the decision to to take the Torino down to get the frame and some other areas blasted before I hauled it home to my garage. 

After the sand blasting was completed, I could really see what I had to start with. The rear frame especially was pitted once all the rust was removed. The front frame looked much better, but still needed some attention. 


Passenger Side Front Frame Rail


Driver Side Front Frame


After pulling out all the old tin that had been installed by previous owners, I found the back seat area rather disturbing. I started having quite a few of those "what the hell was I thinking" moments! Before I let it overwhelm me I decided I needed a plan.


I decided to start on the rear end of the car and work my way to the front. Before I could start putting on any sheet metal, I had to determine where the rear tires would be situated so I could cut the wheel opening in the "new" quarter panels. Before I could do that I needed to install the Frankland quick change rear end. Before I could install the rear end, I needed to clean up the control arm mounts, reinforce the rear frame rails, fabricate fuel cell mounts and remount the rear trunk support and body mounts. 

In the picture above it is pretty clear that a lot of work had to be done to rebuild the rear seat structure because there is basically nothing holding the rear quarter panels in place.

Like the old saying, take ten steps backward to take one step forward. 

I have actually made some pretty good progress on that exhausting list above. This coming weekend I am hoping to put the Frankland quick change rear end together and get it in the car....wish me luck, take care.


Tuesday, July 16, 2019

Punky Manor - Vintage Stock Car - Tribute Build

Engine - The main challenge of the build (Part 2)


Although finding replacement body panels for the Tribute Torino has presented a few challenges, it's the engine I worried over the most. Initially I tried to find an engine similar to the ones Punky ran in his Torino back in 1974. Either a 427, 428, maybe even a 406. I was having a difficult time finding one of those engines that I could afford so I changed my plan a bit. 

I decided to look for a 460 cubic inch marine engine instead. They are easier to find and are much more affordable than a specific car engine that people are hunting for to use in their restoration projects. 

In my last post I talked about the two different 460's that I had purchased for my race car build. The 2nd and more recent one was running, I just had to make it look more like a car engine than something that came out of a boat.

I started the process by swapping out the marine specific parts for parts designed for a car. The water pump and timing chain cover were specifically designed to be used with OMC accessories and would not work with the engine parts I needed to install.

The OMC 460 King Cobra engine was also equipped with an oil pan made for a truck. The deep part of the pan was towards the back of the engine, where the car engines used a front sump pan. I had already purchased a new water pump and was able to use the timing chain cover from the first (Hardin Marine) engine I bought.


I cleaned the engine off pretty well and then masked off everything that didn't need or shouldn't have paint on it. 


After all that, I sprayed the engine with some old Ford blue paint.


Finally I bolted on the Hardin Marine Valve covers that I had re-chromed. I also added the Hardin Marine decals that I recreated, and a Mustang style air cleaner.


Once I had the engine nearly ready to run I decided that I should build a test-run engine stand. I needed to test all the components that were going in the race car as well as see if the radiator held water. I looked at a few examples on the internet and combined the best attributes of them all. 


Well, for the most part all the components seem to work. This is really the first time I've tried to build my own wiring harness. I still have to figure out the correct wiring for the alternator and charging system. Here is a little video of one of the first test fires.


Currently, I have shifted gears a bit. I now have the Torino home where I can work on it. I have decided to start on the rear of the car and work my way forward. I've had areas of the car that will be rebuilt sand blasted, but most of the body panels will be replaced. In my next post I will cover the progress I have made on the Torino so far. Take care