
The "Walldog" art prep approach that I am going to describe here is quite different than how one prepares art for a solo mural effort. The Project Leaders at a Walldog event need to have "visual aids" prepared for all the artists who will be helping finish the project. The attending artists could possibly range from the very experienced to the newest beginner. So, it is really helpful to have full-color prints made for each element of the overall design.
It is also important to have various transparencies printed out which will be used to project the design onto the wall. If the wall is quite large, it might be best to divide the art in sections which could then be pieced together on the wall while projecting. The section sizes would be determined by the actual image area of the projector itself and how much distance is available for projecting onto the wall. Common sense says that if you only have 10 feet away from the wall before you run out of space, the projected image would be quite small. I will discuss this further in "part 2".
I think I should point out some decisions that I made while developing the Balloon Classic theme for the Danville, Il Walldog event. One of the biggest decisions I had to make was based on the overall size of the wall! The wall for my Danville Project is 29 ft. wide x 40 ft. tall. I drove down to Danville a while back to have a look at the wall first hand. At first glance I made the decision to not cover the whole wall with a primered background. I decided instead to do a dry-brush, faded sky effect in the background which would visually enhance the large balloons in the sky. Or at least that is the excuse I'm going with!
Fact of the matter is, we only have 4 days to complete the project. Most of this wall is above the height of the average human and will require an articulated lift and or a scissors lift. These lifts only allow for a few painters at one time and usually block other artists access lower down the wall. There is also the fact that not all artists are comfortable with being 40 ft. from terra firma.
I did the art for my project using Adobe's Illustrator and Photoshop Creative Suite software. I laid out the art in Illustrator using a scale factor of 1/2" = 1' - 0". So each half inch of the artwork will translate to one 12" square on the wall. I also laid out the art using different layers in Illustrator. Here is a look at the Layers pallet for this particular design.

Working in Layers allows me to either show or hide each element of the design and also to lock or unlock each element of the design. Think of layers as a stack of clear sheets that each have an element of the design "printed" on them. I will try to explain why this technique was necessary in this particular case.
As I mentioned above, I made the decision early on in the process to do the blended sky approach for the mural. I also needed to present a concept rendering of the art to the committee organizing the event for approval. So, I needed one copy of the art with the partially transparent sky and one with the full sky. I would use the full version for the presentation "maquette" and the transparent version to project with.
I was also asked by the organizers of the event to produce a maquette or print of the design which would be auctioned off at the event. Some Walldog events host an auction to raise money for a charity or in some cases to fund the preservation of the murals.
So, once again....we need a clean full version to submit for approval and to use as a reference for the maquette.

Then we need a faded out version to print transparencies for projecting.

I also used the transparent version to do an overlay in Photoshop of the concept on an actual photo of the wall to be painted. This gives the organizers an idea of what the art will look like once it is painted....Hopefully!

My point with all this "gooney-babble" is that I was able to put the sky and other elements on different layers and make them visible when and if I needed them.
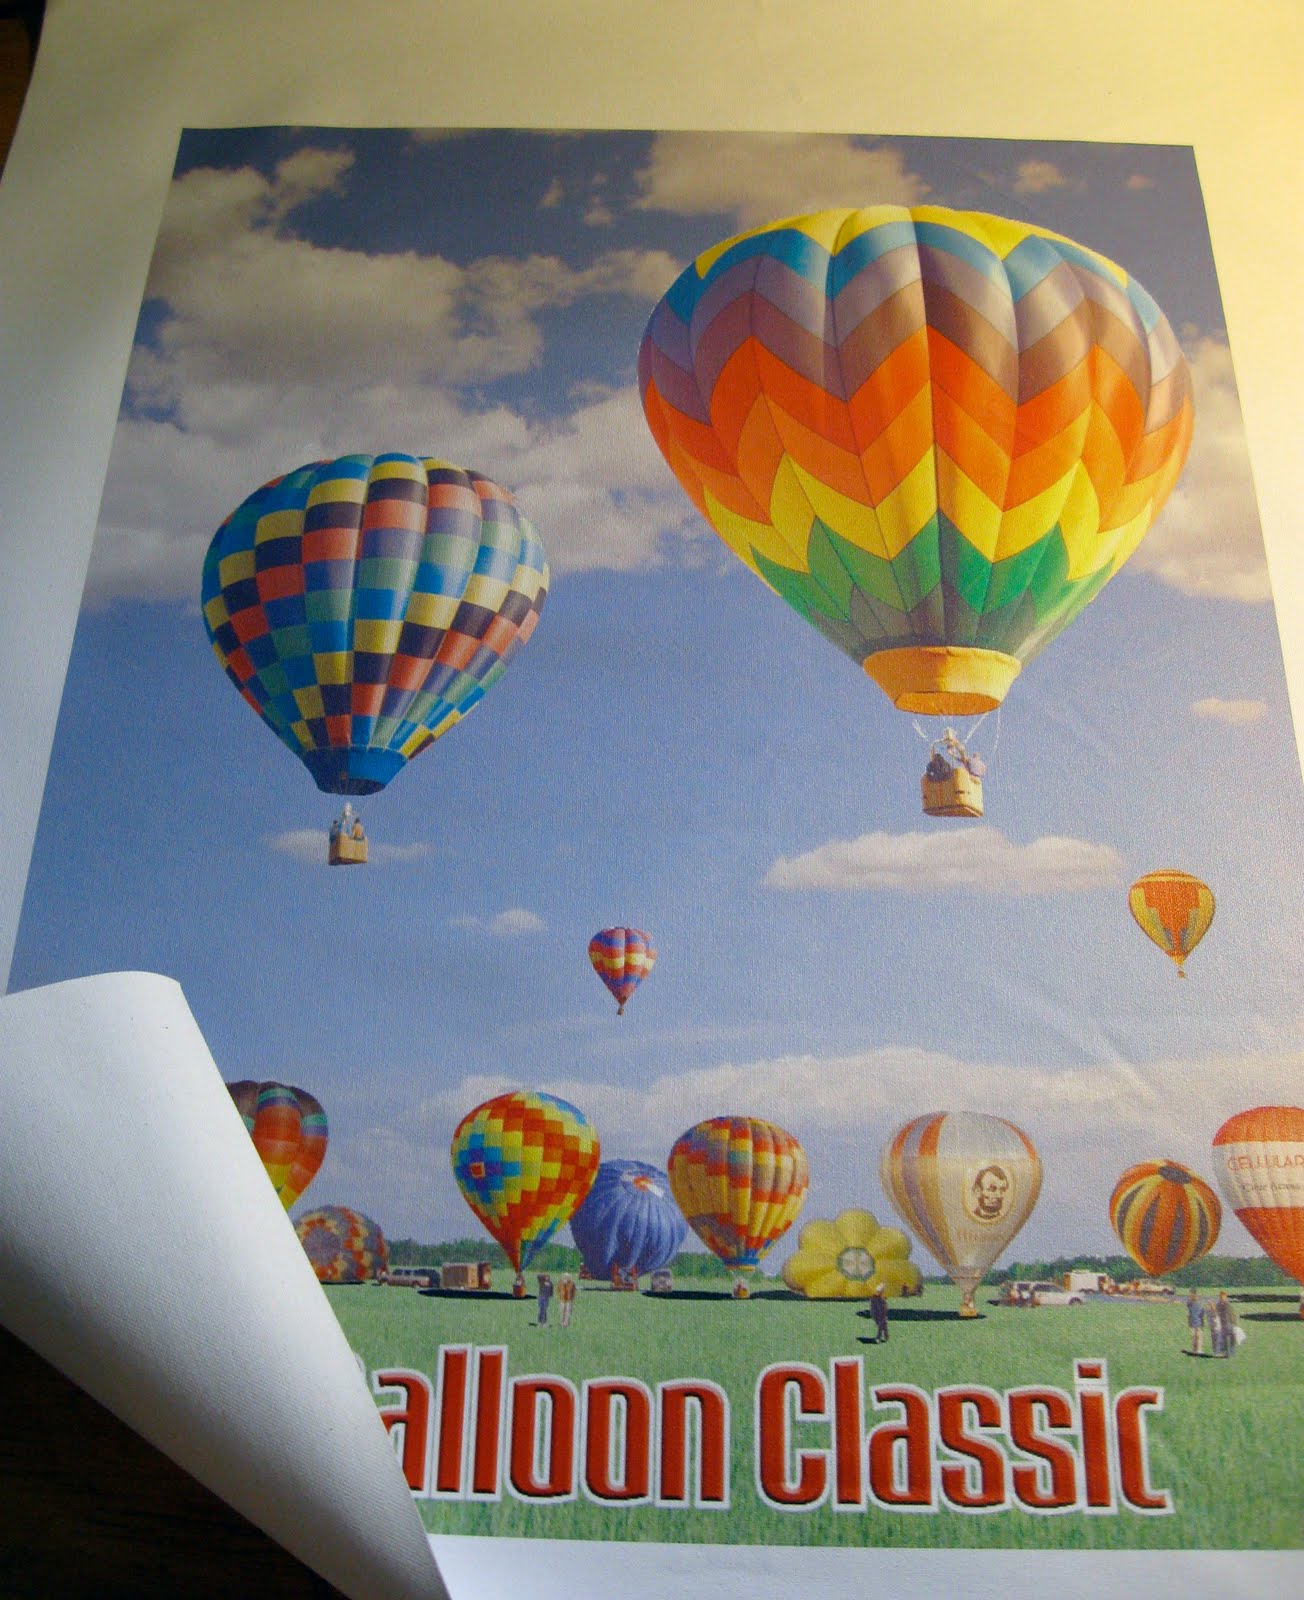
Next decision, what to do for the Art piece that will be donated to the Danville charity auction? I contemplated doing a hand painted scaled down version of the art but decided I just don't have the time to do it justice. At last years Walldog event I did a hand rendered version so I do know the time involved in that process. I could have just had a digital print done of the design and had that framed up? I decided instead to have my design printed on Canvas and then stretch it on a frame so it looks more like an art piece. It seemed the best choice in the time I have available.
So, I ordered a canvas print of the scaled art that I created in Illustrator. I ended up saving a version of the Illustrator art as a PDF file and uploading that to the canvas printing company. After a about a week I received the printed canvas all rolled up in the mail. And they even tossed in the wrinkles for free!
I added a couple of inches to the art to provide enough extra material to be wrapped around the stretcher frame. I then pulled out the trusty old Merle frame clamp!

Cut some wood to the correct length...

Clamped it down...


Then stretched the canvas onto the frame with my shiny new Fredrix canvas pliers.....

Framed and ready to donate...

In Part 2 of the art installment, I will discuss getting the transparencies ready as well as a large format reference prints. I better get busy with that then....
No comments:
Post a Comment